
Cracks, chips, discoloration, and other signs of wear on stucco can not only affect the appearance of your property but may also lead to bigger problems if you leave them alone for too long. For instance, cracks can allow moisture to seep in, which can cause water damage and mold or even compromise the structural integrity of your building.
If you’ve noticed that your building’s stucco is looking tired, weathered, or damaged, don’t worry! The good news is that there are actionable steps you can take to address these issues and restore your property’s exterior to its former glory. Read on to learn what to do when your building’s stucco shows signs of wear so that you can make it as good as new!
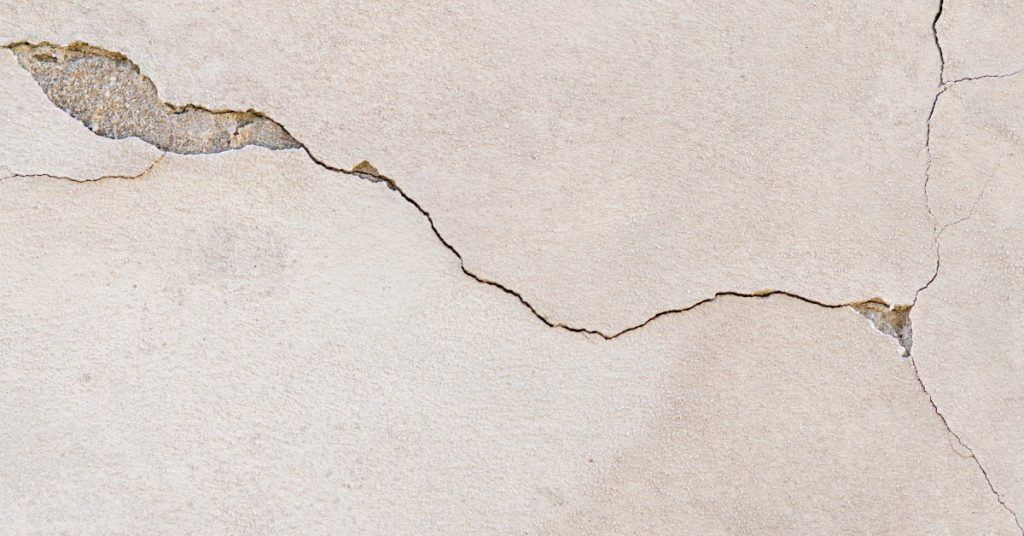
Conduct a Thorough Inspection
Start by taking the time to walk around your building and inspect the stucco carefully. Look for visible signs of damage, such as cracks, chips, holes, or discoloration. Pay special attention to corners, edges, and areas near windows or doors, as these spots are more prone to wear and tear due to weather exposure and moisture infiltration.
Examine the stucco under different lighting conditions, as some cracks or blemishes may be more noticeable in bright sunlight or shadowed areas. Take detailed notes and photos of all the areas that need attention to help you plan your repairs and estimate the scope of the work necessary. Don’t rush this step—it’s the foundation of a successful repair process.
Identify the Cause
Once you’ve identified damaged areas, it’s important to determine the root cause of the wear. Is the damage due to natural weathering over time, prolonged exposure to moisture, water damage from leaks, or structural movement in the building? Identifying the cause will help you decide on the best course of action to address not just the symptoms but also the underlying issue.
For example, cracks caused by foundation shifting may require structural repairs, while discoloration may necessitate pipe repair or mold removal. A proper diagnosis of the cause will help make sure that your repairs are effective in the long term and prevent similar issues from recurring.
Address Underlying Issues
Once you have identified the cause and figured out how to address it, take action. Fix the underlying issue before repairing the stucco. As we have already touched on, some of the most common damage-causing problems include these:
- Water leaks
- Poor drainage
- Structural instability
For example, if water is seeping into the stucco from a damaged gutter or downspout, fix the drainage system first. Similarly, if cracks are forming due to foundation issues, consult a structural engineer to stabilize the foundation. Ignoring the root cause will only lead to recurring damage, no matter how well you repair the stucco. Thankfully, when you address these issues upfront, you’ll save time and money in the long run because your repairs will last.
Clean the Stucco
Before starting any repair work, thoroughly clean the stucco surface. Dirt, debris, mold, and mildew can interfere with how well the new stucco adheres, leading to poor results.
Use a pressure washer on a gentle setting to remove loose dirt and grime, and use a scrub brush with a mild detergent to tackle stubborn stains. If you notice mold or mildew, use a solution of water and bleach to clean these areas thoroughly, as they can spread and cause further damage. Once you’ve finished cleaning, allow the surface to dry completely before moving on to repairs to ensure the proper adhesion of patching materials.
Patch Small Cracks and Chips
For minor damage, such as hairline cracks or small chips, you can use a stucco patching compound specifically designed for stucco repairs. These products are easy to use, and you can apply them with a putty knife or trowel. Carefully smooth out the compound and blend it into the surrounding surface for a seamless finish that matches the existing texture.
If you’re worried about visible differences in the finish, you can lightly sand the area once it’s dry. Leaving small cracks alone for too long can quickly lead to additional cracks spreading, so take care of them early.
Use Caulk for Larger Gaps
If you find larger gaps, holes, or deeper cracks, use a high-quality exterior caulk to fill them before applying new stucco. Choose a caulk that is flexible, weather-resistant, and designed for exterior use, as this will help prevent future cracking due to structural movement or temperature changes.
Then, apply the caulk evenly using a caulking gun, ensuring it fills the entire gap. Smooth the surface with a damp finger or caulk finishing tool for a clean, professional look. Once the caulk cures, you can apply a fresh layer of stucco over it to match the surrounding finish.
Apply New Stucco
For more extensive damage that a simple patch won’t fix, applying a new layer of stucco may be necessary. This process involves removing any loose or damaged material and then using a trowel or a stucco spray gun to apply the new stucco evenly over the affected areas. For best results, it’s important to clean and prep the surface before application.
Also, take your time to spread the material evenly, working in sections to avoid uneven patches. If you’re using a spray gun, practice on a disposable surface first to perfect your technique. A smooth and consistent application is key to achieving a polished look that blends with the existing surface.

Allow Proper Curing Time
Stucco needs time to set and cure properly for long-term durability. Follow the manufacturer’s instructions carefully for the recommended curing time, which can range from a few days to a few weeks, depending on the type of stucco you used. During this time, avoid exposing the repaired area to excessive moisture, which can compromise the curing process. Proper curing is crucial for ensuring the stucco adheres well and remains resilient over time.
Regularly Inspect and Maintain
Stucco repair isn’t a one-and-done job—regular inspections and maintenance are key to keeping your stucco in top condition. Check your building’s stucco regularly for cracks, discoloration, or bulging, especially after extreme weather events, like heavy rain or high winds. Catching small issues early can prevent them from escalating into larger, more expensive problems.
Periodically cleaning the stucco will also help remove dirt and debris, helping to maintain its appearance and prevent damage over time. Proactive care goes a long way in extending the life of your stucco.
Maintaining your building’s stucco is essential for preserving its appearance and structural integrity. A large part of maintenance is knowing what to do when your building’s stucco shows signs of wear. Remember that if you’re ever in doubt about how to handle stucco repairs or maintenance, consulting a professional is always the safest and most effective option. That’s where Stuc-O-Flex International comes in. With our elastomeric stuccoand treatments, we can take care of your stucco and make sure it protects your building for years to come!
Leave a Reply